Quick answer: how to bridge crypto safely
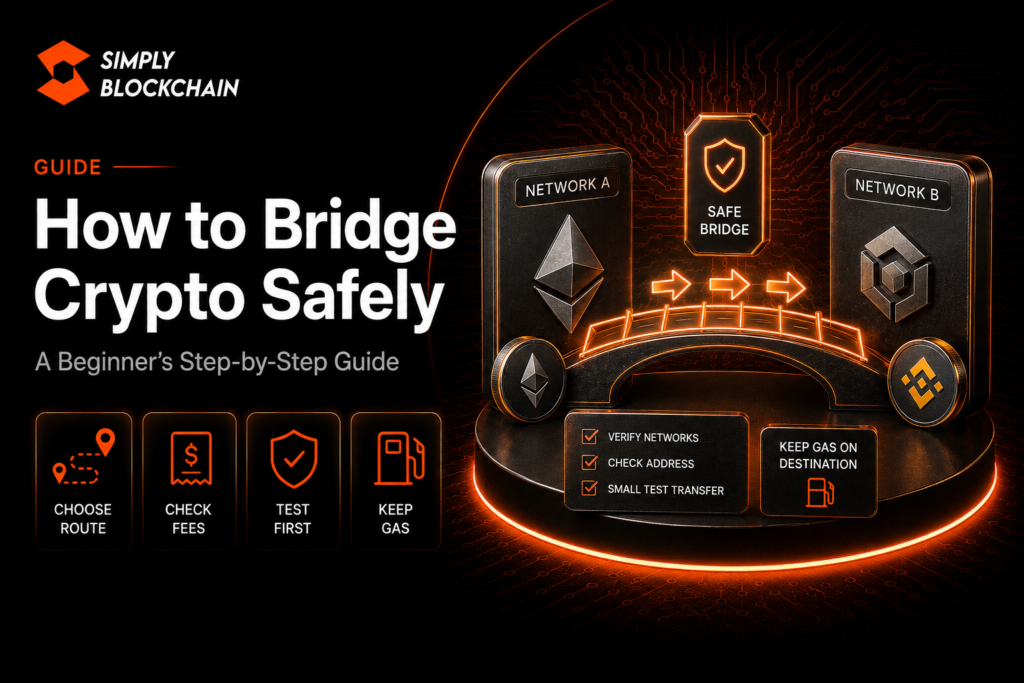
If you want to learn how to bridge crypto safely, think of the process as more than choosing a destination chain and pressing Bridge. You need to verify the bridge, confirm the source and destination networks, check the exact token representation you will receive, understand the fees and transfer time, and make sure you can pay gas on the destination chain.
For a first transfer, use a small test amount when practical. Confirm it arrives exactly where expected before moving a larger balance.
If you do not yet understand what a bridge does under the hood, read Crypto Bridges Explained first.
On this page
Step 1: decide exactly where the asset needs to go
Start with the destination application, not the bridge. Which blockchain does the app support? Which token version does it expect? Does it need native ETH, bridged ETH, native USDC or another asset?
This prevents a common mistake: successfully bridging an asset that the destination app cannot use.
Write down the exact route in plain English, for example: “USDC on Ethereum to USDC on Arbitrum.”
Step 2: verify the bridge
Never search for a bridge and click the first sponsored result without checking it. Bridge phishing is attractive to attackers because users are prepared to connect wallets and sign high-value transactions.
Use the destination network’s official documentation to find a canonical bridge where appropriate, or independently verify the domain of a third-party bridge. Our verify crypto links, contracts and websites guide covers this process.
Ethereum’s official bridge overview also links to bridge comparison and risk resources, including L2BEAT and DefiLlama.
Step 3: check the bridge’s security model
You do not need to become a bridge engineer, but you should know whether the bridge relies on an external validator set, custodial operator, liquidity network or chain-native mechanism.
Ethereum’s developer documentation emphasises that bridge designs involve trade-offs in security, convenience, connectivity and cost. A fast route is not automatically the safest route.
Step 4: confirm the source and destination networks
Check the network shown in both the bridge interface and your wallet. The chain names should match the route you planned.
If the bridge is asking to switch your wallet to a network you did not expect, stop and verify the route. Do not approve network changes mechanically.
Step 5: confirm the exact token
Token symbols are not enough. The same symbol may represent native, wrapped or bridged versions of an asset.
Where practical, verify the contract address on the destination chain using an official token issuer or network source. This is particularly important for stablecoins and wrapped assets.
Step 6: check the full cost
Review:
- source-chain gas;
- bridge or protocol fee;
- liquidity or route fee;
- estimated amount received;
- destination-chain gas needed for the next action.
A route with a low bridge fee may still be expensive if it requires multiple on-chain transactions. Read our gas fees guide for the network-cost side.
Step 7: make sure you will have destination gas
Receiving USDC on a new network does not guarantee you can move it. You may still need the destination network’s native fee token.
Some bridges or wallets offer gas-refuelling features, but do not assume they will. Plan how you will pay for the first destination transaction before sending the entire balance.
Our blockchain networks and gas tokens guide explains this in detail.
Step 8: use a small test transfer
For a new route, a small test can verify the destination network, wallet address, token version and bridge behaviour. The test itself costs fees, so there are cases where an extremely small transfer is uneconomic, but the principle is valuable when moving a meaningful balance.
After the test arrives, confirm the token contract and that the destination application recognises it.
Step 9: bridge the main amount
Reopen or refresh the bridge, verify the same route again, and review the wallet confirmation carefully. Confirm the amount, contract and network before signing.
Do not multitask across several bridge tabs. Keeping one clear route reduces the chance of switching networks or addresses accidentally.
Step 10: verify the destination transaction
Use the bridge status page and the destination block explorer to confirm completion. Bookmark official explorers rather than relying on links sent by strangers offering “support”.
What if the bridge transfer is delayed?
Do not immediately submit the same bridge transaction again. First check whether the source transaction succeeded and whether the bridge is still processing the cross-chain message.
Some routes have intentional waiting periods. Ethereum bridge documentation notes that designs have different finality and trust assumptions, so transfer times can vary significantly.
If you need support, use the bridge’s official help channel reached from the verified domain. Never share a recovery phrase or private key.
What if the wrong token arrives?
Do not swap or send it blindly. Verify the contract address and determine whether it is the bridge’s expected representation. If the destination app needs a different token, you may need an additional swap or bridge route.
A token can have the same symbol as another asset while being a different contract entirely.
What if you bridge to the wrong network?
The outcome depends on the wallet, bridge and chain. If you control the same wallet address on the destination network, the asset may still be accessible, but it might not be the network you intended to use.
Do not trust unsolicited recovery services. Verify the transaction on-chain and consult official bridge documentation before taking another action.
Canonical bridge versus cross-chain aggregator
A canonical bridge is usually the route most directly associated with a particular network or rollup. A cross-chain aggregator searches one or more third-party routes and can sometimes combine bridging with swapping.
Aggregators can be convenient, but convenience adds another layer to evaluate. Check which underlying bridge or liquidity provider is actually moving the value and whether the interface shows that route clearly.
Bridge first or swap first?
Suppose you hold USDC on Ethereum but need another token on Arbitrum. You may have several possible routes: bridge USDC then swap, swap on Ethereum then bridge, or use a cross-chain route that does both.
The best route depends on liquidity, bridge support, fees and which asset is safest to move. Compare the final destination amount and number of transactions rather than assuming one sequence is always cheaper.
Do not bridge every last unit of gas
If the asset you are bridging is also the source-chain gas token, leave enough behind for any final transaction you may need. Likewise, make sure you will have a usable gas balance on the destination chain.
Getting stranded with tokens but no gas is inconvenient and can force you to make an additional exchange withdrawal or bridge transfer just to move them.
Use block explorers during the process
A block explorer lets you independently confirm that the source transaction was submitted, whether it succeeded and which contract it interacted with. On the destination chain, the explorer can show when the corresponding asset arrives.
Learning to read the basic fields — status, from, to, token transfers and network fee — makes bridge troubleshooting much safer than relying on screenshots or direct messages from supposed support agents.
Bridging large amounts
For a significant transfer, consider splitting the process into a small verification transfer followed by the main amount. Re-check the bridge’s current status and official notices before the larger transfer, especially after recent network upgrades or security incidents.
Do not assume a route that worked months ago is unchanged. Bridge contracts, token representations and supported chains can evolve.
How to bridge crypto checklist
- I know the exact source and destination chains.
- I know the exact token I should receive.
- I verified the bridge domain independently.
- I understand the broad bridge security model.
- I checked the total cost and expected arrival time.
- I will retain or obtain destination gas.
- I used a small test transfer when practical.
- I checked the first transfer on a block explorer.
- I will not share my seed phrase with bridge support.
Frequently asked questions
Can I bridge directly from an exchange?
Some exchanges support withdrawals to multiple networks, which can achieve the same practical goal without using a separate bridge. Confirm the withdrawal network and exact token support before sending.
Is a native bridge always best?
Not necessarily. Native or canonical bridges can have strong ecosystem alignment but may be slower or support fewer routes. Compare security and usability rather than using one label as a guarantee.
Why is my bridged token not showing in my wallet?
The wallet may not automatically display the token. Verify the destination transaction and contract address before manually adding a token. Never add a contract supplied by an unsolicited support message.
Can a bridge transaction be reversed?
Normally not once the relevant on-chain transactions are final. If the bridge has not completed, the protocol may have a recovery path, but that depends on the specific system.
Final thoughts
Learning how to bridge crypto safely is mostly about preparation. Know the route, token version, bridge, fee token and destination before the first signature appears.
Cross-chain transfers add another layer of protocol risk, so move deliberately and verify each stage rather than treating bridging like a normal wallet-to-wallet send.
This guide is educational only. Bridge mechanisms, fees and recovery processes differ between protocols and networks.
